
When you decide to wear a kimono for the first time, you’re about to embark on a fascinating cultural experience. But before you can fully appreciate the beauty of this traditional garment, you’ll need to navigate a few essential steps. From understanding the different types of kimonos and their corresponding occasions to mastering the intricacies of obi tying, there’s more to wearing a kimono than simply putting it on. As you prepare to take the first step into this rich cultural heritage, you’re likely wondering where to start – and that’s exactly where we’ll begin.
Understanding Kimono Types and Occasions
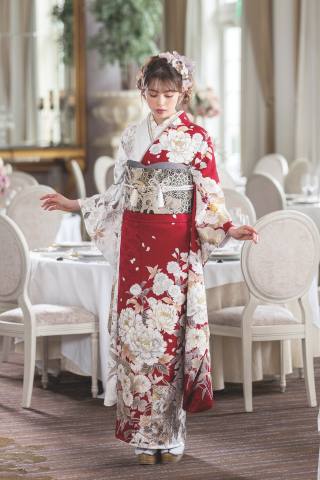
Choosing the right kimono can be a daunting task, especially with the numerous types and occasions to consider.
You’ll need to think about the time of day, the season, and the formality of the event. For example, a Fukuro obi kimono is suitable for formal events, while a Yukata kimono is perfect for casual, summer occasions.
You’ll also need to consider the fabric and pattern of the kimono. Silk kimonos are usually reserved for special occasions, while cotton kimonos are more suitable for everyday wear.
You’ll also need to think about the occasion itself. A Kurotomesode kimono is typically worn to formal events like weddings and funerals, while a Iromuji 振袖 購入 is suitable for tea ceremonies.
If you’re attending a traditional Japanese festival, a Furisode kimono would be a great choice. By understanding the different types of kimonos and the occasions they’re suited for, you’ll be able to make an informed decision and choose the perfect kimono for your needs.
Preparing Your Undergarments and Accessories
You’ve picked out the perfect kimono, but don’t think you’re ready to wear it just yet.
Before slipping into your beautiful garment, you need to prepare your undergarments and accessories. Traditional Japanese undergarments, such as a juban or nagajuban, are designed to be worn under your kimono.
These undergarments are usually made of lightweight, breathable fabrics and have a simple design that won’t compete with your kimono. You can also wear a thin slip or camisole as a substitute if you don’t have a traditional juban.
When it comes to accessories, you’ll need to choose a pair of tabi socks and zori sandals or geta clogs.
Tabi socks are ankle-high socks with a separation between the big toe and the other toes, allowing you to wear zori or geta comfortably. Make sure your tabi socks match your kimono’s colors and pattern.
Finally, add some traditional Japanese hair accessories, such as kanzashi or hairpins, to complete your look.
With your undergarments and accessories in place, you’re one step closer to wearing your kimono confidently and authentically.
Mastering the Art of Obi Tying
Now that you’ve prepared your undergarments and accessories, it’s time to focus on the crowning glory of your kimono ensemble: the obi.
This wide sash is what holds your kimono in place, and its tying technique can make or break your overall look. Don’t worry, mastering the art of obi tying takes practice, but with these tips, you’ll be well on your way.
Start by facing a mirror and standing with your feet shoulder-width apart.
Hold the obi behind you with both hands, making sure the ends are even and the fabric is smooth.
Cross the right end over the left, then bring it under and up, so it forms a loop.
Take the left end and pass it through the loop, pulling it gently to tighten.
You should start to see the obi take shape.
Continue to fold and tuck the ends, making adjustments as needed, until you achieve a smooth, symmetrical knot.
Remember to keep your movements slow and deliberate, and don’t be afraid to experiment with different tying styles.
With patience and practice, you’ll be tying your obi like a pro in no time!
Putting on the Kimono With Ease
The kimono is finally ready to be worn, and with a few simple steps, you’ll be sliding it on like a pro.
Start by holding the kimono with the left side facing you and the right side facing away. Slip your right arm into the right sleeve, making sure it’s not twisted. Then, slide your left arm into the left sleeve, again ensuring it’s not twisted.
Next, bring the right side of the kimono across your body and align it with the left side. You should feel the kimono start to drape over your shoulders.
Adjust the kimono so it’s centered and the sleeves are even. Now, take the right side of the kimono and fold it over the left side, securing it with the koma (small tabs) on the inside of the kimono.
You should feel the kimono snug against your body. Make any necessary adjustments to the fit, and you’re ready to move on to the next step.
Finishing Touches and Final Checks
As you stand in front of the mirror, your kimono is almost complete. Now it’s time to add the finishing touches.
First, adjust the collar to sit comfortably around your neck. Make sure it’s not too tight or too loose. Next, check the sleeves to ensure they’re even and hanging correctly. You can also add a few subtle folds to the sleeves to create a more polished look.
Take a step back and examine your overall appearance.
Ensure the kimono is smooth and wrinkle-free, and the obi is tied securely. If you’re wearing a juban, adjust it so it’s not visible under the kimono. Finally, add any accessories such as geta sandals, tabi socks, or a kimono pin.
Take a deep breath, and you’re ready to go! Remember to walk confidently and comfortably in your kimono – it’s all about embracing the traditional Japanese style.
Conclusion
You’ve made it! You’re now dressed in a beautiful kimono, feeling confident and prepared for your special occasion. Take a final glance in the mirror to ensure everything is in place. Adjust your obi one last time, smooth out any wrinkles, and fluff out your sleeves. You’re ready to take on the day, embracing Japanese culture and tradition with elegance and poise.